19
Few culinary experiences rival the primal satisfaction of cooking over wood smoke after an exhausting day on the trail. Yet for many campers, mealtime quickly devolves into one of two extremes: boiling freeze-dried rations from a mylar pouch, or burning hot dogs to a crisp over raging yellow flames while their interiors remain stone cold. The common assumption is that elevating campsite dining requires hauling half your home kitchen into the woods along with an array of specialty culinary gadgets.
In reality, memorable outdoor cooking requires the exact opposite approach. When you understand the physics of open-fire heat management and lean on a handful of durable, versatile staples, you can turn humble ingredients into restaurant-worthy dishes. The campfire ceases to be an obstacle you have to manage and becomes the most dynamic cooking surface in your repertoire.
The Fire Beneath: Cooking with Embers, Not Flames
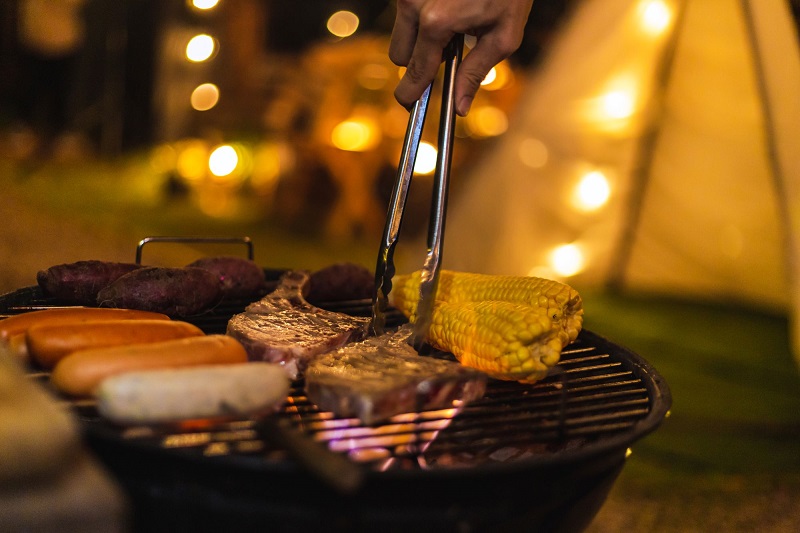
The fundamental mistake most outdoor cooks make is attempting to prepare food over active, leaping flames. Direct fire produces erratic heat, coats cookware in thick, gummy soot, and chars food exterior surfaces before the core has a chance to heat through. Real campfire cooking happens almost exclusively on hardwood coals.
Before pulling a single ingredient out of the cooler, establish a two-zone fire layout:
-
The Fuel Zone: Maintain an active fire on one side of the pit where logs are continually breaking down into incandescent embers. This serves as your heat engine throughout the evening.
-
The Coal Bed: Use a small shovel or a green hardwood stick to scrape a steady layer of glowing gray coals over to the adjacent side of the pit. This flat, radiant bed provides consistent, controllable temperature resembling an indoor stovetop.
By shifting hot coals in or out of your cooking zone, you regulate heat with remarkable accuracy. If a skillet sizzles too violently, push a few coals aside. If an iron pot loses its simmer, rake in a fresh scoop of red-hot embers from the fuel zone. Controlling the foundation of your heat transforms every subsequent step from guesswork into deliberate technique.
Building a Resilient Campsite Pantry
Cooking in the wilderness is governed by environmental limitations. Space in a cooler is strictly finite, ice melts steadily, and fragile produce bruises easily under bouncing road vibrations. Crafting rich meals with minimal ingredients begins with choosing resilient items that withstand travel while pulling double duty across multiple dishes.
Prioritize sturdy, dense vegetables that do not require precious cooler space. Yellow onions, garlic heads, sweet potatoes, and whole green cabbages can live comfortably in dry dry-storage bags for days without spoiling. Cabbage, in particular, is the unsung hero of outdoor cooking; unlike fragile salad greens that turn to mush under damp chill, whole cabbage wedges hold their crispness, sear gorgeously over coals, and provide a sweet, caramelized flavor when subjected to intense dry heat.
For proteins, lean toward naturally cured or vacuum-sealed items that tolerate temperature fluctuations better than delicate poultry or ground meat. Smoked sausage links, thick-cut bacon, block cheeses like sharp cheddar or aged gouda, and canned legumes like black beans and chickpeas offer shelf stability and rich dietary fats.
Rounding out the kit with a reliable neutral cooking oil, kosher salt, black pepper, a bottle of hot sauce, and a couple of fresh lemons gives you the foundational acid and seasoning needed to lift simple campfire fats into balanced, complex dishes.
The Indispensable Heavy Metal: Mastering Cast Iron
If you carry only one piece of specialized cookware into the woods, make it a well-seasoned ten-inch or twelve-inch cast-iron skillet. Aluminum mess kits warp under coal heat and develop fierce hot spots that scorch ingredients instantly. Cast iron absorbs the radiant thermal energy of a coal bed, distributing it across a thick, forgiving base that retains heat even when a cold wind cuts through the campsite.
A single skillet unlocks an endless rotation of high-yield one-pan meals:
-
The Golden Breakfast Hash: Dice parboiled potatoes, toss them with bacon dripping or olive oil, and let them sit undisturbed against the iron until a deep, crunchy crust forms. Crack a couple of eggs directly into indentations between the potatoes, drop a metal pie tin over the skillet as an improvised lid, and let the trapped steam gently set the whites while keeping the yolks liquid.
-
Charred Sausage and Cabbage Steaks: Cut thick cabbage rounds, sear them over medium coals until blackened along the leaf edges, and push them toward the cooler rim of the pan. Drop sliced sausages into the hot center to render their savory fat, allowing the flavorful drippings to braise the surrounding cabbage leaves. Finish with a squeeze of fresh lemon juice to cut through the richness.
Dutch Oven Baking Over Coals
For multi-day excursions where weight is not an issue, a cast-iron camp Dutch oven featuring a flanged lid opens another dimension of wilderness cooking. By placing coals directly onto the recessed rim of the lid as well as underneath the legs, you create true three-hundred-and-sixty-degree radiant convection.
This setup allows you to bake golden buttermilk drop biscuits, slow-simmer bean-and-sausage chilis, or braise beef cuts with minimal liquid and negligible manual monitoring while you sit back and enjoy the sunset.
Elevating the Humble Foil Packet
The classic foil packet—often called a hobo dinner—suffers from an unfortunate reputation for yielding soggy, uninspired meals. That failure is almost always the result of improper layering and trapping too much ambient water inside the pouch.
When built intentionally, a foil packet functions as an airtight pressure vessel that caramelizes sugars while locking in volatile aromatics.
Always use heavy-duty aluminum foil, cutting a sheet twice as long as you think you need. Lay dense, slow-cooking root vegetables like thinly sliced carrots or parsnips on the very bottom layer where they sit nearest the heat source. Layer proteins and fast-cooking aromatics—such as sliced shallots, garlic cloves, or fresh rosemary—over the vegetables. Drizzle the ingredients generously with butter or olive oil, ensuring moisture comes from flavorful fats rather than plain water.
Fold the foil edges over the ingredients and create tight, double-crimped seams along every perimeter. This keeps steam contained within the packet, allowing internal temperatures to rise rapidly without burning the food. Set the packets directly onto medium-temperature embers, avoid flipping them excessively, and let them cook undisturbed for fifteen to twenty minutes. The resulting meal requires zero dishwashing and delivers remarkably rich, concentrated flavor profiles.
Direct Ash Roasting: The Ancient Shortcut
One of the most satisfying open-fire cooking techniques requires zero pots, pans, or foil wrappers: roasting unpeeled vegetables directly inside the dying embers.
Dense root crops with thick skins—whole sweet potatoes, russet potatoes, yellow onions, and unhusked sweet corn—are built by nature to withstand direct contact with heat. Bury whole, unpeeled sweet potatoes directly into a bank of fine gray ashes flanking the coal bed. The outer skin functions as a protective shield, blistering and charring into a tough, carbonized barrier that seals moisture completely inside the vegetable.
Inside that carbon shell, the interior flesh roasts in its own natural juices, breaking down starches into rich, caramelized sugars. After thirty to forty minutes, pull the potato from the ash bed with metal tongs and test it for tenderness by gently squeezing the sides; it should yield like a soft sponge.
Slice the scorched skin down the center, peel it back, and scoop out the steaming, butter-soft interior. The flesh absorbs a subtle, delicate wood smoke that no indoor kitchen oven could ever replicate. A pinch of flaky sea salt, a knob of butter, and a dash of smoked paprika turn an unpeeled vegetable into the standout dish of the entire trip.
The Strategic Importance of Home Prep
The real secret to stress-free campfire cooking happens before you ever load the car. Chopping raw onions, peeling cloves of garlic, and measuring out dry spice blends at a wooden picnic table in the gathering dusk is messy, attracts insects, and burns through daylight.
Invest thirty minutes in your home kitchen the evening before departure:
-
Chop hardy vegetables and pack them in reusable, airtight zip bags.
-
Whisk together dry spice rubs—garlic powder, smoked paprika, coarse sea salt, and cumin—and store them in compact, screw-top containers.
-
Pre-cook stubborn ingredients like dried grains or dense potato cubes to reduce on-site cooking times over the fire by half.
Arriving at the campsite with ingredients already washed, pre-cut, and portioned means your culinary workload at camp consists purely of assembly and fire management. You eliminate clutter, slash cleanup time down to a quick scrape of the skillet, and keep the focus where it belongs: relaxed conversation around a warm, glowing hearth.
Campfire cooking does not require complex recipes or gourmet pretension. When you treat temperature control as a craft, lean into reliable, whole ingredients, and let the natural character of cast iron and wood smoke do the heavy lifting, even the simplest dinner becomes an extraordinary ritual.